
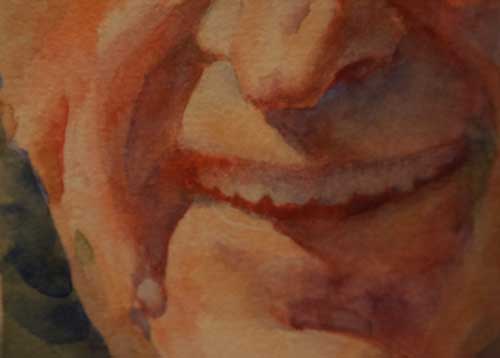
Last week I left this blog in a sort of a cliff hanger, with a painting of teeth that looked like the wicked smile of a television vampire. This week I want to show you how I repaired that purple smile.
Scrub out mistakes
I’ve heard many people say that watercolor is unforgiving. That’s not entirely true; you can scrub out all but the most persistently staining colors. It’s true that you’ll never get the same clarity that pristine paper under pigment will give you, so in some styles of painting (like Charles Ried‘s off-the-cuff splashy style) scrubbing isn’t really an option.
I paint tonally, and I find I can work around the surface of the paper being slightly damaged. It also helps that I use a tough paper like Arches #300 that can, like Timex watches, take a licking and keep on ticking.

I first tried scrubbing out the purple lips with my trusty ancient Winsor Newton Series 7 . There’s something about sable that will gently get into the paper and loosen the pigment.
But sometimes the sable can’t do much. That ghastly purple color on his lips was mineral violet, which is obviously a staining color. What to do?
Sandpaper! I used a very fine sandpaper (P800) to rub away the purple smile. I made sure the watercolor paper was absolutely dry to avoid tearing it apart. The sand paper removed the color and made a smooth surface on the paper that will take paint almost as well as the original paper.
Redefine the teeth
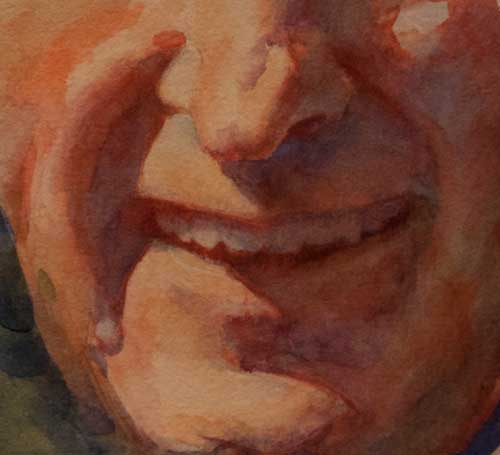
Using a clean mixture of cadmium red light and quinacridone rose I restated the negative space that defines the shape of the teeth. Getting the shape of the teeth is important for finding a likeness; in this study I made the teeth just a bit too long, so I adjusted the shapes a bit. The brightness of the red is startling, but it’s important to get the right value of the color in the shadows. I lowered the chroma (the brightness and intensity of the color) later.
Why use red in this instance? Because the lips and mouth are areas that are filled with blood. Even if it looks dark, it’s going to be a warm dark. The red gives a base for this warm, bloody darkness; a cool wash will tone this down but still allow the life of the initial red paint to glow through.
Balance color

I refined the teeth some more, and used a darker red to give the inside of the mouth a bit more color shift. At this point I also balanced the color on the rest of the face.
Final cool wash
Once I felt satisfied with the values and shapes, I took the last scary step: a cool blue wash over the shadowed parts of the face. This is a step that’s difficult to recover from, so I really look closely at a painting, sometimes letting it sit for a few days before I make my move.
When everything was the way I wanted it, I mixed up a very clean, light puddle of cobalt blue and glazed over the shadows areas, paying close attention to the lost and found edges of the wash. This is what watercolors do best; the cobalt blue subdues the brightness of the colors, but allows them to glow through the blue pigment.
Related links
- How to paint teeth in watercolor (mockingbirdsatmidnight.com)
- Where I learned about using sandpaper

Reading about (and seeing) your use of color makes my mouth water—-just like thinking about food! It’s delicious. . .
Chris, do you taste colors? I do sometimes. And I hear food. Weird, huh?
Faces and teeth are really difficult to do. Your delicious art and detailed instructions make your post well worth the read!
Thank you. I hope it was helpful to you.