How to begin a painting


Study for painting 3" x 5" watercolor painting
Study for painting
 I’ve started the drawing for this painting. Six hours into the drawing and I feel like it’s just beginning to emerge from a mush of pencilscratchings. But I dreamed the colors, and couldn’t wait to get them onto paper. 

Painting is a very slow process for me. I’m not a slap dash painter; I dream, plan, draw, make more drawings, prepare my references, compose the image, draw the image, stew and chew my cuticles, draw some more, then finally start to paint. In a world of instant gratification, I’m a total throwback.

But when, at his workshop last week, Ted Nuttall told me to keep working on my drawing for the whole of the first day, my heart kind of grinched around in my chest. I’d already spent a lot of time on that drawing, but hey, I was paying the man to help me with my life’s work.  I kept at the drawing, all day, and eventually, I really looked at it.  And there was a sorting, as if things were sliding into place. I found a multitude of drawing mistakes that would have plagued me once I began to paint; fixing those mistakes felt really good, like scratching an itch in the deep part of my heart. The painting eventually became Strength. It has a certain clearness, a crispness that I really like. It makes music in my head.

There are days, though,  when I have to simply let go and paint. If you paint, you know what I mean: You need to feel the water love the brush, and the brush kiss the paper with paint . That’s the time for color  studies.

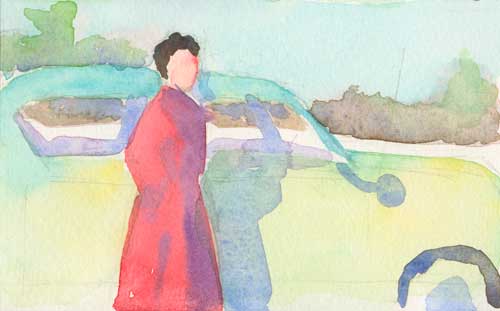
These next two studes are for a painting my Dad has requested. It’s a small black and white photo of my mom he’s had in his wallet for nearly 60 years (can it be that long since they were so young, beautiful, and full of early romance?).

Study for painting 5" x 3" watercolor study
Study for painting
5″ x 3″ watercolor study


It’s interesting how the composition and editing of the background changes the story. What stories do you see?

Study for painting 5" x 3" watercolor study
Study for painting
5″ x 3″ watercolor study

Things learned and a few abstractions

Abstract 1
Abstract 1

Last week I lived beyond cell phone and internet reach as I  attended a week long workshop taught by watercolorist Ted Nuttall. As I expected, I learned so much (yes, the back of my head blew off a couple times!). Let me share just a few of the most important concepts I took away from this wonderful experience..

1. Slow down. No, I mean s-l-o-w d-o-w-n. I spent a lot of time thinking about my next brush stroke. Where should it go? What color should it be? How would it react with the other colors already on the paper? When I finally acted, it was with intention rather than panicked splashiness.

Abstract 2
Abstract 2

2. Think abstractly. This was probably the single most important concept I tried to internalize. I’ve been unhappy with my work lately, finding it a bit flat, and lacking the broken color and fine edges that make my head ring with internal music. By concentrating on making each small passage its own tiny abstract painting, (that of course, relates to the whole image) I was able to add interest and visual variety to otherwise flat passages.

Abstract 3
Abstract 3

3. Think color. I tend to get stuck in one single color: orangey-red flesh tone. But that’s not what a person looks like. Skin tones are made up of many different hues and chromas. By varying color, saturation, and value, the painting is not only more exciting, but more like life. So I went (a little) crazy with color, using combinations I don’t normally choose.

Abstract 4
Abstract 4

4. Be uncomfortable. I made a decision that every brush stroke I put down would make me uncomfortable. I not only walked a watercolor tight rope, but I bounced a bit on the artistic high wire.  Sometimes my brushstrokes set me teetering and wheeling, but after a bit of nail biting (and whining), I regained my balance and continued  painting. You know what? Those seemingly near disasters turned out to be the best parts of the painting.

My workshop painting is still not quite finished, so I’ll not post it yet, but I’ve cropped a few of the tiny abstract paintings that make up the whole. I find them quite lovely all by themselves.

Color Theory #3

This is one of the llamas at Clove Cottages in New York State. I drew the llama here. She was painted (for a color theory class at the local community college) using a double-split color scheme, which means I used two pairs of complementary colors.  Magenta and green, and blue-violet and yellow.

This is close to the palette I normally use.  But I’m usually pretty disorganized, and choose colors randomly. I’ve never restricted myself to only a few pure tube colors. (I had no tube color for blue-violet, so I mixed up a big puddle of ultramarine blue and  alizarin crimson. The pigments did tend to separate out, but when remixed, they made a familiar blue-violet of which I am very fond.)

Sometimes restrictions upon artwork conversely allow you more freedom. With only four colors available to my paintbrush,  I first spent a lot of time playing around, figuring out how those paints would mix. Then I planned the painting—colors and temperatures of the shadows and the highlights. Only then did I start splashing on paint.

The actual painting took very little time. After so much preparation, making the picture was exhilarating. It felt like skateboarding down a steep hill; there were some bumpy spots, but mostly it was fast and furious. And I didn’t fall off once.

Color theory #2

The Henny Penny in this post  was painted using an analogous color scheme. That is, all the hues came from the same corner of the color wheel. Transparent pyrrol orange, quinacridone red, and perylene maroon (all Daniel Smith watercolors). Not exactly analogous, but pretty close.

The analogous colors are interesting to work with. When mixed, they often increase in intensity. I used the perylene maroon, a dark value, dusky pigment to try to tone things down a bit.

The trouble with the analagous palette in watercolors is that, unless you use black paint, which I don’t, the paints will often not create as dark a value as you might need. They are inherently incapable of making a dark dark. So to make the eye dark enough, I had to mix in a touch of sap green to the violet. It made a nice dark eye. Too dark, I see now. I need to add a little highlight.

Color theory #1

Orange and Blue
Watercolor © 2011 Margaret Sloan

This picture is part one of a three-part final for an online color theory class I took with the local community college.

We were learning about color harmonies. This color scheme is complimentary; I painted this using only two colors across each other on the color wheel. I guess I cheated a little bit, because I used quinacridone orange (my favorite orange right now), and ultramarine blue. Not exactly across from each other (I should have used cyan, but I am never very good at following instructions.)

But, oh! the color combinations from mixing orange and blue! I especially love the good, rich browns, which could then be lightly washed with pure color—orange or blue—to warm  or cool the area.

(This image is a photo I took at the local farm Hidden Villa. I’ve drawn their animals many times, which made the photo simply a placeholder for the shadows forms and values.)

Color theory

I’m finally taking a color theory class (at a local community college). I’ve never studied color formally, but I finally decided that it was time. So last Monday night I spent the evening sorting by value 314 Color-aid swatches.

This was no picnic. By the end of the evening my eyes felt like a bad sunburn in sandy bluejeans. They became hypersensitive to colors; I took a break from my sorting and went to the restroom; in the institutional gray of the college bathroom, any thing with any color in it seemed to burn and glow.

Whew.

One of the things that my watercolor guru, Steve Curl, is always on to me about is my value range. “Your painting is all in the mid-value range,” he admonishes. “Go darker.”

Go Darker. It’s a mantra in my studio. But until I struggled through the Color-aid deck, I don’t think I had an idea of what “go darker” meant, or where to place along a grey scale any particular alizaron crimson, quinacridone orange, or pthalo green.

After I wrote this post, this poem popped up in the recommendations from WordPress. It’s lovely. Read it.

Gaining knowledge in the intimate presence

I’m reading Robert Henri’s The Art Spirit. He says, “I think it is safe to say that the kind of seeing and kind of thinking done by one who works with the model always before him is entirely different from the kind of seeing and thinking done by one who is about to lose the presence of the model and will have to continue his work from the knowledge he gained in the intimate presence.”

He thought that the latter artist worked with more mental activity; the artist always “studies for information.”

I drew this portrait with this quote in mind, and in 60 minutes (3 20-minute sets) I got enough information down that I think I can bring it further along without the model. I also had my color chart with me, but in the hurry of trying to capture her likeness, I wasn’t able to make good color choices. I can see that I need more oranges and reds to make the flesh look less “dead.”


Value Studies

As I’ve said, I need to do some color studies to understand the power in my box of Rembrandt soft pastels. So the first thing I’ve done is just sorted them out in a way that makes sense to me. One the left are the orange (warm) colors. Next over I’ve drawn pink (cool) colors. Some of these pinky hues are not chalk straight from the box; they are mixed and cooled down for the sake of the chart, because some of the chalk colors are inherently warmer and more orange in hue. However, I needed those particular values to make the complete value range. The remaining colors-green, blue, and violet—don’t really fit in a graded value chart on their own, but provide the good, rich base notes, or the high, singing discordancies that Chris Saper recommends in her book.

James Gurney (of Dinotopia fame) has had a series of excellent posts on color and color wheels. Thanks to him, I’m working my way through David Briggs in-depth site, The Dimensions of Colour.


Quick color temperature

Pastel and chalk on toned paper

This year at the atelier I learned modeling using color temperature—we used a limited palette of 4 earth-toned pastel pencils, charcoal and white chalk, and toned paper to create form and shadow.

This method is about intellectualizing your drawing. It’s about making a conscious plan rather than just grabbing a color and hoping it will work. We drew value scales in color to denote the color temperature of highlight, strong light, midtones and shadows, paying close attention to warm and cool color temperature and where it was placed in the scale. This is agony for me. I don’t do it well. Scales suck.

Since I am also a musician, I know the value of scales. I think of them as athletic training, like the drills that prepare the football player for that winning 100-yard dash. Playing scales prepare the musician for a blindingly brilliant set. Playing the actual notes become muscle memory, the body goes on automatic pilot and the musician’s  intuitive brain is free to choose the music she hears in her head.

I figure it must be the same for the style of painting I’m yearning to do. Once I’ve internalized color temperature theory, I’ll be more able to make intuitive choices that are based on logic.  That’s when I think true creativity can emerge.

Value chart for warm light

So I drew value scales religiously for each of my drawings this year. They helped. It’s surprising how far astray you can go from your original values over the course of a long pose. I leaned heavily on those value scales to re-orient myself and to overcome frustration. I know I frequently muttered things like, “strong light is cool. Cool, dammit!”

But on the last day of class this year I decided to whip out a drawing using the color temperature principles without agonizing over a value scale. The drawings at the top of the post were of ten minute poses each on toned paper. I did have to write the color temperatures down so I could remember which shadow was cool, which highlight was warm, but I didn’t need to draw a value scale. I was pleased that the concept is beginning to integrate into the way I choose color.