
Today was the life drawing session (Yay!) at Town Hall Arts Galerie Copper in Copperopolis. It’s a nice small-town art store with a gallery and a studio for art classes. Our models there have been very good, especially considering we are in such a remote area. If you live in Calaveras County, you should check out their classes, as well as their art supplies and gallery full of locally produced art. Maybe I’ll see you there!
I met a friend at the figure drawing session in Copperopolis; she hadn’t done much figure drawing, and since it’s hard to shut me up when it comes to drawing, I volunteered to coach her through the session. After the session I couldn’t stop thinking about how I’d teach figure drawing if I were ever able to get a class together. I thought that on the blog I’d pass along a few tips to help make your figure drawing (heck, all your drawing) more accurate, and hopefully less frustrating and more fun.
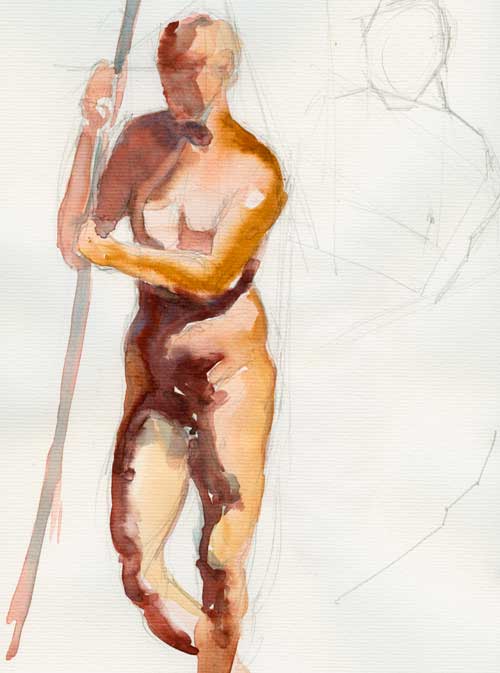
Watercolor on Biggie watercolor paper
Measure
Yes, I know it’s awkward to stick your out your hand and sight down you arm to your pencil. It’s like you think you’re some kind of *ahem* artist or something. But trust me on this, your drawing will be more accurate, and it will come together more quickly once you get the hang of measuring and comparing length and width, and calculating angles. In the example above you can see some of my block-in lines. Those angles help with the placement of not just all the body parts, but the placement of the figure in space as well.
Sadie Valerie in San Francisco has a great video demonstration (click here) about using angles to block in shapes.
It’s hard to draw accurate proportions, but if you compare the length, width, and height of all the different parts of the figure (okay, use that part if you must) it will help keep your drawing under control.
I know there are good artists who don’t measure, and you know what? Good for them. I measure. Lots of artists measure. And the the more you measure, ultimately the less often you’ll need to measure as you develop and train your eye and hand.
Leave the extremities for later

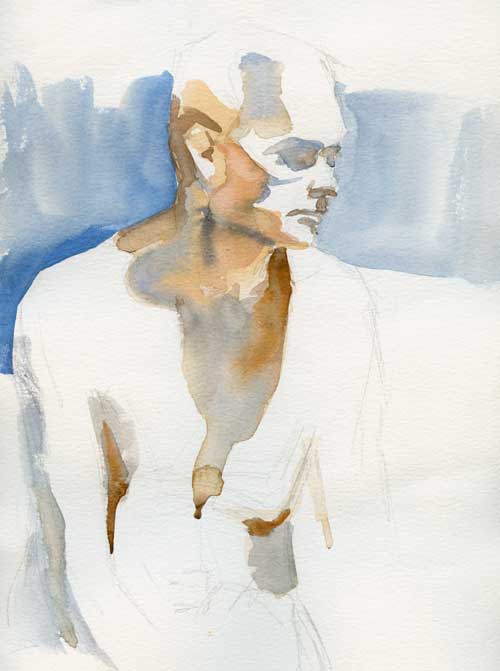
watercolor and graphite on #300 Arches hot press
Hands and feet are hard to draw, so leave them for later, or for a longer session. Concentrate on drawing the torso before you start detailing the hands and feet. If you get the gesture and pose of the torso on your paper, often the viewer will fill in the hands and feet with their mind. After all, we know they’re supposed to be there.
Think in terms of shape, not line
Watercolor on #140 Arches paper
Squint to see the large masses of shadow and light and draw those shapes. They describe form, and when you hit those shapes correctly, BAM! Your image will pop. Check the angles, measure those shapes. And sometimes it helps to divorce your mind from the object you’re drawing and ask yourself, what does that shape look like by itself? Maybe it looks like Michigan, or a gorilla, or a sloth sleeping upside down. Draw that shape.
My working method for these watercolors
Since I’m working on the Thirty Paintings in Thirty Days project, I took my watercolors with me for this session. For these poses I drew the figure first with pencil, making sure that I had correct shapes for the shadows. After so many life sessions, I have a sort of inner clock that alerts me to the time left for a particular pose, so I’m able to put down my pencil and pick up the paintbrush with enough time to lay in a few blocks of color. Then I go home and fiddle with them some more, trying to remember the pose and the way the light fell across the form.
